Replacing an aging sewer line demands more than digging and swapping pipes. You must work within local building codes, secure the right permits, and coordinate inspections every step of the way.
Skipping these steps risks fines, failed inspections, and costly rework down the road. At On Time Experts, in Garland, TX, we guide Texas homeowners through the maze of regulations so your sewer line upgrade proceeds without surprises.
Understanding Local Sewer Code Requirements
Every Texas municipality enforces its own plumbing code, often based on the International Plumbing Code with local amendments. Your first task is to find out which version your city or county has adopted.
Some jurisdictions require sewer lines to be buried at least 12 to 24 inches deep, depending on local frost-line and traffic conditions. Slope requirements are also common, with 1/4 inch per foot a typical standard for building sewers. Material rules vary, too; PVC may be allowed alongside traditional cast iron, but only with approved fittings.
You’ll also see regulations on tapping into the public main and on backflow prevention devices. A code violation might force you to dig out newly laid pipe and rework the trench, so study the code early and clarify any gray areas with the local inspector’s office. Having the right measurements and materials list in hand makes your permit application smoother and avoids last-minute hold-ups.
Navigating the Permit Application Process
Once you know the code requirements, it’s time to file for a permit. Most Texas cities now offer online portals where you upload your plot plan, a detailed scope of work, and proof of licensure if you’re hiring a plumber. Expect to provide the location of your house, the path of the new sewer line, and details on trench depth and shoring methods.
Permit fees vary by municipality and by project size, so budget for that expense up front. After submission, plan for a review period that can last from a few days to a couple of weeks. If the reviewer flags missing information, respond quickly with revised drawings or additional details. Once the permit is issued, post it visibly at your worksite so the inspector can verify compliance at each stage: trench, rough-in, and final inspection.
Coordinating Pre-Construction Inspections
Before you break ground, the inspector will want to verify that your trench plan and materials match the approved permit. You’ll need to stake out the trench line, show that you have the correct pipe and bedding material, and demonstrate a plan for erosion control if the dig is extensive. In some areas, you may have to call for a utility locate to avoid hitting gas or electrical lines.
The pre-construction inspection keeps everyone on the same page and can reveal hidden site challenges, like unexpected rock layers or shallow bedrock that require deeper excavation. With the inspector’s sign-off, you can proceed knowing that each element, depth, slope, and pipe type meets code before you invest in labor and materials.
Recognizing Best Trench and Bedding Practices
A solid foundation for your new sewer line begins with trench preparation. The code typically mandates a minimum trench width and depth, but it also stipulates bedding material to cushion the pipe. You’ll want about 3 inches of sand or fine gravel beneath the pipe to support it evenly. Once the pipe rests in place and passes the slope test, backfill with select fill up to a certain height before switching to native soil. Each lift of backfill should be compacted to avoid settling. Thorough compaction prevents low spots where water can collect and helps the pipe maintain alignment.
Following these practices not only satisfies code but also extends the life of your sewer line by avoiding misalignment and joint stress.
Knowing Rough-In and Pressure Testing Requirements
After bedding and partial backfill, the inspector will check your rough-in before final covering. You must demonstrate that your pipe maintains the correct slope, usually 1/4 inch per foot for building sewer lines, and that fittings face the right direction.
Many jurisdictions also require a pressure test. Some use a water test with a 5-foot head of water, while others may allow a low-pressure air test. Passing that test confirms you have no leaks before the soil permanently conceals the pipe. Proper testing prevents sewage seepage into your yard and protects groundwater. When the inspector sees a stable pressure reading, you earn the green light to complete backfilling and move toward final approval.
Spotting Common Permit Pitfalls
Some homeowners get tripped up by permit pitfalls that slow down the project. One is failing to include grading information on the plot plan, which can leave your permit reviewer guessing how stormwater will flow after excavation.
Another common issue arises when DIYers use non-licensed labor or unapproved pipe materials, which often leads to voided permits. Also, if you tie into an existing cast-iron sewer lateral with a plastic transition, code may require a special coupling. Document each material choice and each subcontractor’s credentials to avoid having the inspector replace what they deem substandard. A smooth permit process depends on thorough documentation from day one.
Managing Inspections During Construction
While trenching and laying pipe, you’ll call for multiple inspections: trench, rough-in, and final. Each one checks a different stage—trench depth and bedding, slope and joint integrity, and final workmanship. Plan your schedule so you’re not waiting for an inspector while your crew stands idle.
In some areas, inspectors operate on set windows, so you’ll want to book those slots as early as your permit allows. If an inspection fails, you get a correction notice detailing what needs fixing. Address those issues promptly and schedule a re-inspection. Tracking each approval keeps your project on budget and minimizes downtime.
Completing Final Inspection and Approval
The final inspection happens after all trenches are backfilled and the sewer line connects to the public main or septic system. The inspector reviews the as-built layout against your originally approved drawings, confirms that cleanouts are accessible, and checks that materials and slope match requirements.
They’ll also want to see proper restoration of landscaping or driveway areas. When everything aligns, you receive your final approval. That document provides legal proof that your sewer line upgrade meets Texas code and gives you peace of mind that your system is sound for years to come.
Keeping Your New Sewer Line in Top Shape
Once your new line passes final inspection, maintain it with good habits and occasional service. Avoid pouring grease or harsh oils down the drain, and use strainers on hair-heavy fixtures. If your property is prone to root intrusion or recurring clogs, periodic hydro-jetting or camera inspections may help keep your line clear.
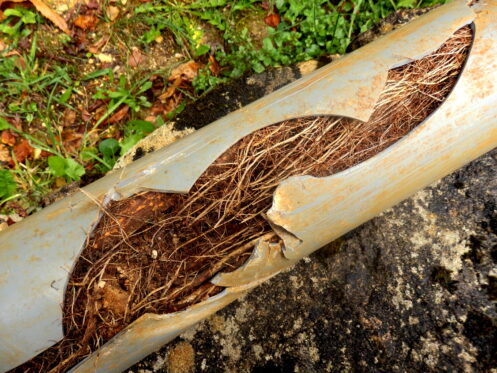
Watch for early warning signs of trouble—slow drains, foul odors, or unusual gurgling—and call a licensed plumber right away. A small clog caught early costs far less to clear than a collapsed section that requires reopening the trench.
Preparing for Future Upgrades
Texas codes evolve, and future environmental or stormwater regulations could require retrofit work. When you upgrade landscaping or add an accessory dwelling, the building department may ask for an as-built sewer map or plumbing data. Save all your permit documents, inspection reports, and as-built drawings in a dedicated file.
Ready to Upgrade Your Sewer Line?
At On Time Experts, we handle every step, from code research and permit filing to trenching, testing, and final inspection. We also offer drain cleaning and camera inspections to keep your lines clear between upgrades.
If you’re planning a sewer renovation or any other plumbing service, give us a call today to get started on a smooth, code-compliant process.